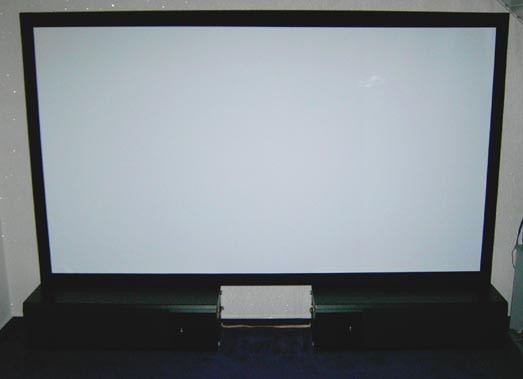
Instructions to build a framed projection screen with 2,70 m screen diagonal
A framed projection screen is possibly the best choice to get an optimal result. Building your own projection screen is the cheapest solution and it offers the possibility to use the available wall space in an optimal way. Given the flat and straight surface, the projection screen always has the ideal position in relation to the projector, as it is wall mounted.
To build a framed projection screen you need the following supplies:
- 1 board (e.g. particle board or wooden panel) with a flat surface. The length and width should represent the whole size of the projection screen including the frame. To save money ask for a second quality piece or for leftovers *
- Screen material - available in this shop (**)
- 1 frame made of velvet coated tape - available in this shop (**)
- 2 wall holder (see description below) - available in this shop (***)
- Plugs and screws for the wall holders (will be delivered together with the wall holders)
- Eyelets and respective tools available at any local hardware store or use Holdon eyelets to hold the material– available in this shop
- Attachment screws or nails – available at any local hardware store or DIY store
- Rubber band to attach the screen material to the board – available at any household supply store. I used sealing rings. (****)
- 2 thin (not thicker than about 3mm) light wood boards with the same size as the masking – available at any DIY centre or local carpenter
- 2 maskings made of velvet coated black tape – available in this shop **
- 2 metal hooks (see description below) to hang the masking so it is still movable – available at any local hardware or DIY store
* I bought a particle board as a leftover at a local carpenter with little flaws in the surface coating which didn’t matter in this case. Size: 2,49 m x 1,46 m.
The planned width of the frame was 7 cm (front side 7 cm + 1,5 cm thick + rear side 2,5 cm = 11 cm). Together with the particle board this results in a 2,70m screen diagonal with a 16:9 aspect ratio.
** In order to get a flat and straight surface just pin the screen material upside-down to a flat wall for 2 or 3 days as it certainly will be curved after shipping. Do the same with the frame and the masking.
*** You can buy the wall holders in this shop:
Image wall holder for board:
Image wall holder from side of the wall:
**** I flattened the sealing rings at one spot with scissors so they have fit better through the holes/eyelets in the fabric.
First use a regular hole puncher to perforate the screen fabric about every 15 cm. Then place the eyelets with the eyelet tool in the holes, you can also use the optional squeeze-in eyelets. Then pull the rubber bands through the holes (eyelets). The screen material is thick enough to hold the rubber bands without the eyelets, that’s why Holdon eyelets are optional.
As shown in the following images put the nails or screws in the board at 10 cm or more away from the edge.
Please make sure to add the material that will be folded over plus the width of the frame to the desired screen surface. In the event you need dimensions other than what is available in the shop please send an e-mail to info@leinwandbau.info
Rear side framed projector screen:
Cut in the corner of the screen fabric, then fold one side over the board and attach the rubber bands to the nails/screws. Then turn the board through 180° to attach the other side. Continue with the two sides.
Now the frame can be attached on the front side of the screen fabric. In order to align the edge of the frame (which means the velvet coated tape) with the edge of the board, pin a cord onto the front side of the board. Measure the distance of the pins to the edges of the board before so you know the needed length of the cord.
Then remove the protective foil and start on one side to attach the tape on the screen. Ask someone to give you a hand to make sure it’s completely straight and parallel to the board edge. This has to be done with the screen lying on the floor so the frame can’t be curved. Otherwise it won’t be 100% parallel to the board. Fold over the overlaying part of the frame.
Now enjoy your self-made framed projection screen!
Build your own projection screen, it’s easier than you think!


