REPLACING CEILING CANVAS FABRIC
REPLACING THE FABRIC OF A ROLLER SCREEN OR CEILING SCREEN
Step 1: First, you need to remove the old defective or wavy screen fabric from the roller of the old roller or ceiling screen. Once the fabric is removed, thoroughly clean the roller of any remnants of the old fabric. If there are still residues of the old screen fabric, these will press through several layers of the new fabric and will be visible as impressions on the new fabric.
ATTACHING THE NEW CANVAS TO THE CLEANED ROLLER
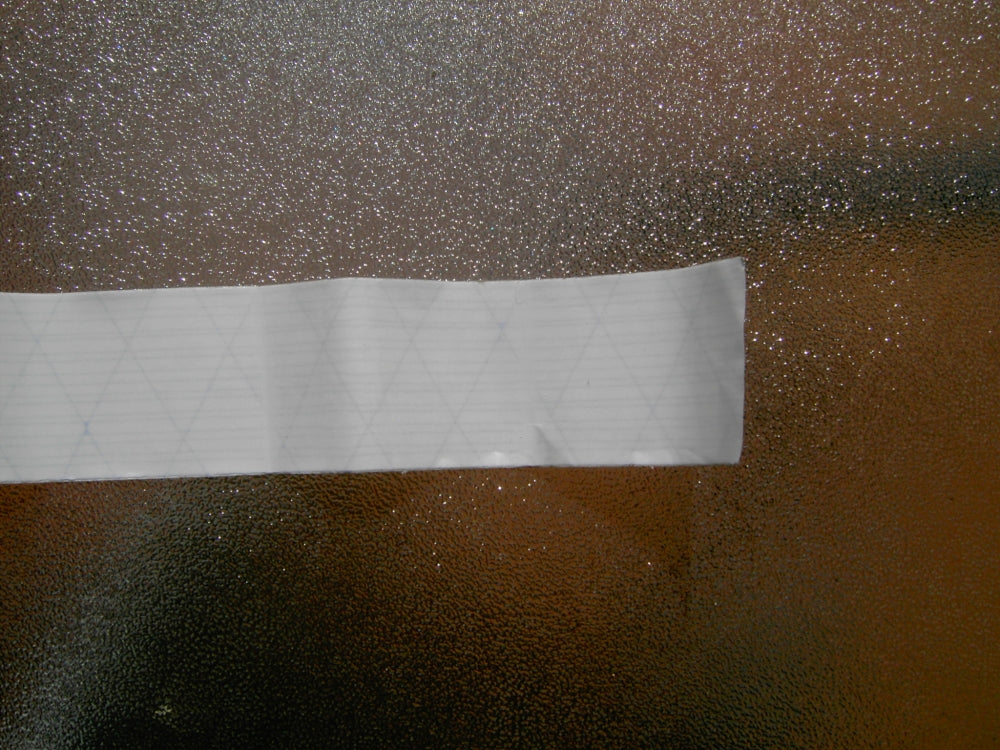
To fix the canvas to the roller, first wind the canvas completely straight onto the roller. Once it is lying nicely straight, unwind the canvas from the roller again, leaving only the last 1-2 turns. Fix the canvas aligned with the roller using aggressive adhesive tape. That means sticking the tape half onto the roller and half onto the beginning of the canvas. This will temporarily fix the canvas to the roller. Then, use spray adhesive to spray the roller with the adhesive. Once this is done, wind the canvas a few more turns around the roller and let it sit for 24 hours to dry the adhesive.
Once the adhesive has dried, the roller can be reinstalled into the screen, and the canvas can be used with the screen.
It is also always helpful to have a drop bar at the bottom of the canvas. Here, I recommend cutting a metal tube lengthwise (extending about 5cm beyond both sides of the screen). Then, screw the canvas like a sandwich with wooden strips. A wooden strip at the back, the canvas in the middle, and another wooden strip at the front. Afterwards, slide the metal tube over the canvas from the side. The wooden strips must fit into the metal tube, otherwise, it won't work. Finally, add two plastic end caps to the metal tube, and the drop bar is complete. This looks very nice, as the canvas appears to emerge from the metal tube.